
Can you call it a cupboard if it doesn’t hold cups? Hmmmm.
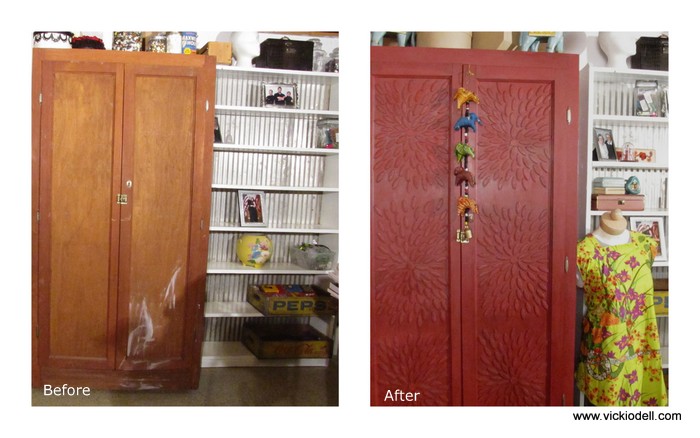
I have this cupboard in my new studio space that Warren found somewhere back when he was in college. It’s perfect for storing lots of my sewing supplies. The problem is 1- it’s kind of ugly and 2- when Tyler was helping me paint after he moved out he somehow managed to get paint all over the front of it. UGH!
So I decided to give it a makeover last week.
It took two full evenings to get done but it went pretty quickly and was super easy.
I removed the doors and carried them upstairs to sob through the last few episodes of season 4 of Parenthood watch television. So even though there are nearly 450 joiner biscuits on the doors it was relatively painless.
OMG you guys! Season 4 of Parenthood is KILLER!

Here is what I used:
- Americana Decor Chalky Finish Paint – Rouge
- American Decor Cream Wax – Deep Brown
- DecoArt Americana 2″ Waxing and Finishing Brush
- Elmer’s ProBond Advanced
- 3 containers (150 count) DeWalt Joiner Biscuits – Lowe’s
- 6 – 2 inch wooden circles

And here is how I did it:
- Remove doors and hardware.
- Paint the cupboard with Americana Decor Chalky Finish Paint in Rouge. This cupboard is really old and the wood was very dry so it absorbed quite a lot of paint and needed two coats.
- Paint the doors with one coat of Americana Decor Chalky Finish Paint in Rouge.
- Attach the biscuits and the wood circles to the door face as desired with Elmer’s ProBond Advanced. Remove the doors and lay them on a flat surface and lay out the biscuits in the desired pattern before gluing. Glue the biscuits in place one at a time. Let dry.
- Paint the doors with another coat or two of Americana Decor Chalky Finish Paint in Rouge. Let dry.
- Using the 2″ wax brush apply American Decor Cream Wax – Deep Brown following manufacturer instructions.
- Re-attach the doors.
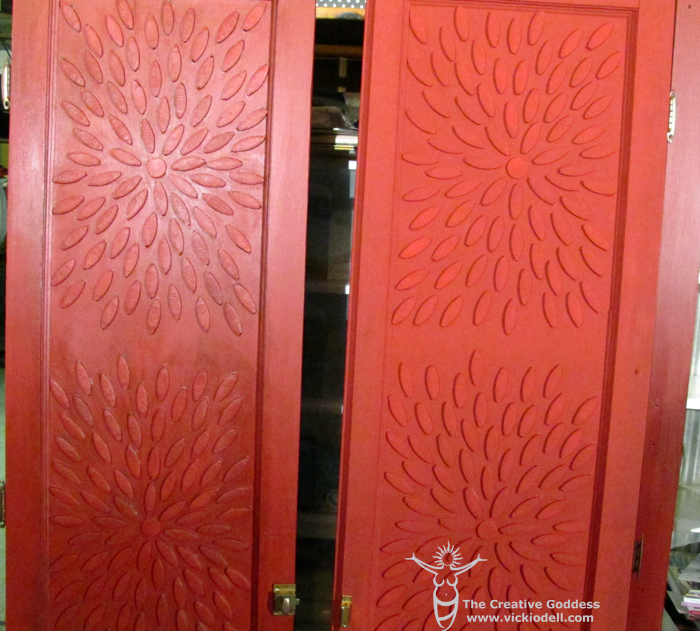
The door on the left has the wax applied and the door on the right does not. Applying the wax gave the piece a wonderful aged look and helped the biscuits to stand out.
You can tell I wasn’t super duper careful about making the biscuits look perfectly aligned or spaced. I wanted it to have kind of a funky handmade look.
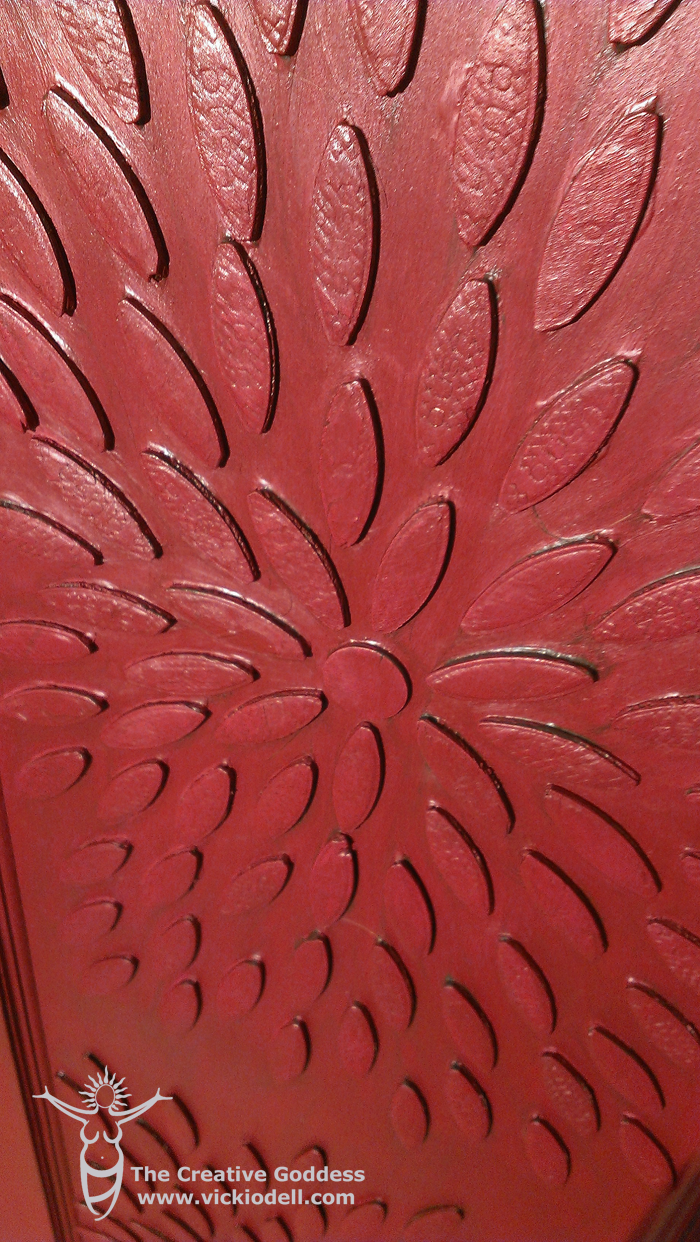
When I first bought the biscuits I thought I would hate the texture on them but I actually ended up loving it. It gave the piece a very aged and kind of hand-carved look.
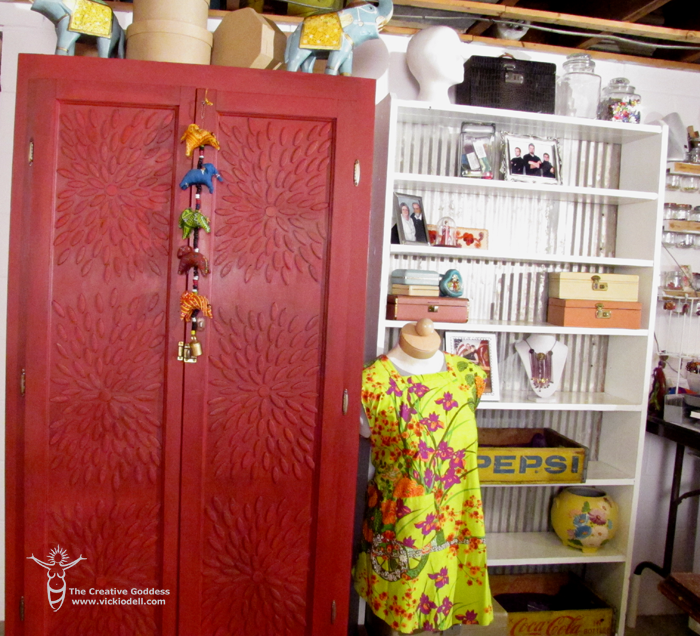
I’m super in love with the way my new studio space is evolving and I can’t wait to show you more of it.
I had been seeing the DecoArt Chalky Finish paints all over the web for a while and have been wanting to try them. I LOVE that you can simply open the jar and go to town with no sanding or other prep for the furniture.
I do need a little more practice with the wax as it can be kind of tricky but I’m madly in love with this piece and it fits my kind of bohemian global gypsy style perfectly.
Disclosure: This is NOT a sponsored post. I was provided some of the product used in this project but all opinions are 100% honest and my own.

Wow! The use of the biscuits is genius! This turned out great. laurie
Thank you Laurie! 🙂
I would have never though to use the joiner biscuits. That is so clever!!! This came out just beautifully, Vicki! Love the color! TFS!
Thank you Kris. I’m kind of crazy about that color myself. It’s really yummy. 🙂
It’s lovely! The dark wax really makes it WOW! Does it take a lot off elbow grease to buff the wax? The old shoulders, elbows and hands just aren’t what they used to be! LOL
It does take a little elbow grease both to rub the wax in and to buff it off. I have a bum shoulder and had to take lots of little breaks as well as switching hands.
This was kind of a HUGE project to start with. A smaller project would be much easier.
I have a small tabletop bookcase and some antique white chalk style paint I’ve wanted to get to, but have hesitated due to the “owee” factor. A small piece I believe I can slowly accomplish. Thanks, Vicki!
Looks great! Love seeing photos of your new studio space.
Thank you Chrystel. I’m supposed to be part of a studio blog hop on 4/1 so sick around.