As you know, I’m off in Chicago at the summer CHA (craft and hobby association) trade show and my friend Laura Bray from Laura Bray Designs has generously offered to guest post for me today.
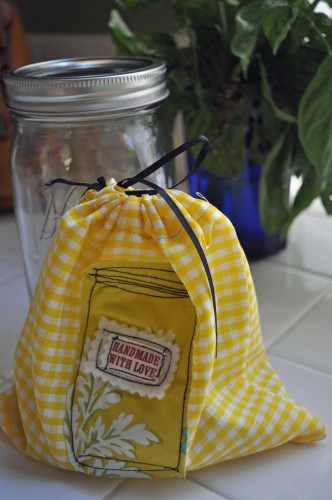
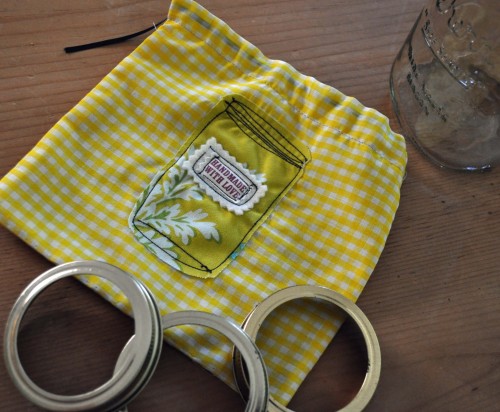
I’m madly in love with this bag to hold canning jar rings!
I have NEVER known how to store all of those canning jar rings. If I put them in a drawer they quickly take it over as I use up my canned goods. If I keep them in my large canning pot I have to climb to a very high shelf to put them away each time. I mean, it’s super easy to take them all out and use them while I’m canning but as I use up my canned goods one at time, I’m never quite sure what to do with the rings until I need them again.
This is the perfect solution and it helps that it’s stinkin’ ADORABLE as well.
Ok, I’ll stop talking your eyeballs off and let Laura tell you how she did it….

If you regularly preserve your summer harvest, you know all too well that the canning jar rings can be difficult to store. While you can’t reuse the sealing lids, you can save the rings for reuse. I created this cute little bag to store them in. Of course, the bag would also make a very cute gift bag too!
Supplies:
16” x 8” rectangle of fabric. I used yellow gingham.
20” ribbon
Small scrap of printed fabric. Charm size works great!
1.75” x 1” rectangle of felt
Ribbon with Handmade sentiment printed on it. If you can’t find ribbon, you can embroider the sentiment or print it out on ink-jet fabric.
Basic sewing supplies
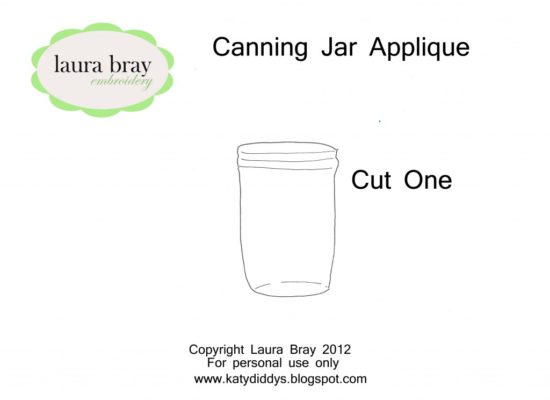
Canning Jar Applique Pattern

Directions:
Using the applique pattern, cut a canning jar shape from your printed fabric. Put aside.
Fold gingham fabric’s short edges down approximately one inch and press. Stitch along bottom of pressed edge to create your casing.
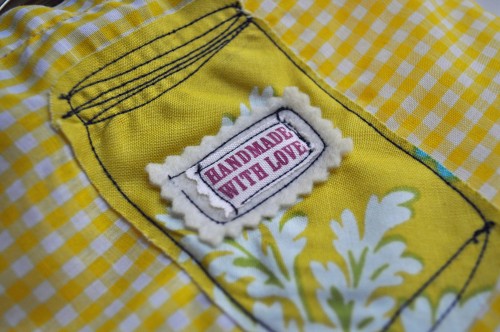
Place canning applique on one end of the gingham fabric, with the top of the jar a few inches down from sewn casing. Pin in place and then use free-motion embroidery to outline the applique and create the lines of the canning jar lid and the bottom of the jar.
Stitch the felt piece and printed ribbon onto the jar to represent the label.
Fold the gingham fabric in half, right sides together. Pin in place and stitch around three sides. Be careful not to stitch over the casing openings on each side!
Press and turn bag right side out. Pin a safety pin onto end of ribbon and pull through the casing.

Laura Bray is a designer, writer and lifestyle expert. She inspires creative women to live a life of balance & simplicity by sharing her modern twist on traditional home arts. Whether you stitch, cook, are raising children or just want to be a better housekeeper, you are sure to find great tips and tutorials on her blog at Laura Bray Designs.

I know this is a bit of an old project, but I can’t find the download for the mason jar??
LOVE the bag.
Hmmmm. Not sure what happened to the printable image. Let me see if I can track that down for you Esmeralda.
Ok, I figured it out Esmeralda. Just click on the words in orange “Canning Jar Applique Pattern” and it will open another window so you can print out the pattern. I hope that helps!
XOXO Vicki
Thank you so much for your assistance. I can’t wait to make one. I know I am a little late to the party but I showed up 🙂
You can never be late to this party Esmeralda! I’m glad you joined us! xoxo Vicki
Just an FYI: You’re never supposed to store the canned goods with the ring on. After the seal is established and the jars are cooled, remove the ring before putting your canned goods away. And never, ever stack the jars! 🙂
But I do like the concept of the little bag to store the rings in. I think I might make one and hang it on the outside of the cupboard in the garage where I keep all the canning tools.
Thanks for the tip Cher! 🙂
Sooo cute!! Thank you for the pattern. I can’t wait to make this!
Adorable! My grand baby boy is named Mason so he will be having this on all his toy bags soon! What a great idea for all those little things that get spread around the house.
This is a great idea for all those plastic lids floating around, which have come from cream cheese containers, hummus, prunes, and other asundry soft food items.
It’s a “duh” moment, when something so simple can solve the lid problem.
Might be a way to attach a cup hook to your inside cabinet side and hang the bag up.
This post came just in time. I had been contemplating on how to package some specialty teas I am making. Placing them in an artsy bag is the perfect answer. Thanks so much to you for posting and for Laura’s great idea.
Cheryl, I’m so glad the post was helpful for you. I’m a HUGE tea fiend so I think crafting and tea are perfect companions! 🙂
Thank you for allowing me to be a guest blogger today Vicki!
No, Laura, Thank YOU! I am madly in love with this project and will definitely be making one of my own! 🙂
I need this! I’m kicking myself at not realizing I have a tub full of fabric scraps and could have made one ages ago. D’oh!
Ha! That’s how I felt when I first read the post too. Very useful and smart project.