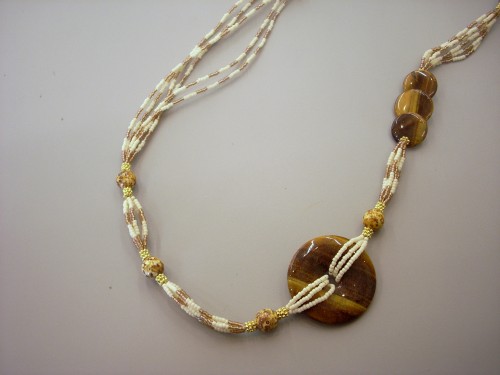
Asymmetrical Donut Bead Necklace
Supplies:
- Beadalon Gold Colored (7 strand) Wire .018″ Size M
- 36 14k gold spacer beads
- 3 Strand clasp
- 5 Round glass beads
- 1 Donut focal bead
- 3 flat beads
- 1 pkg. cream colored seed beads
- 1 pkg. tan colored seed beads
- crimp beads
- Wire cutters
- crimper
- Several small bead stoppers (Toolbox Tuesday – Bead Stops)
NOTE* All beads need to have holes large enough for six strands of the wire to fit through. You may need a bead reamer if the holes are a tad too small. And if you need help selecting a bead reamer you can read my post about the Beadalon Bead Reamer.
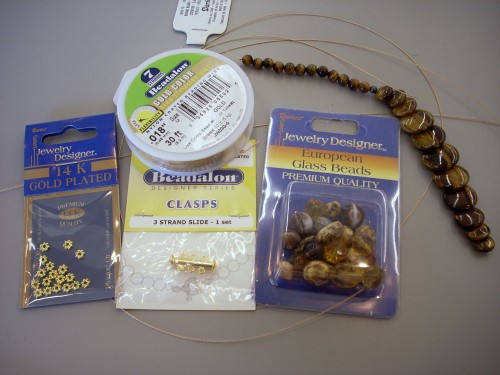
(some of the supplies I used are pictured here)
1. Cut six strands of the wire 25-26 inches long depending on your neck and necklace length preference. I have a big buffalo neck so I originally made this necklace 27 inches long then went back later and shortened it. I guess my neck isn’t quite as big as I think it is. 🙂
2.Start out by putting enough seed beads on three of the wires to go through and around the focal donut bead. I used 35 seed beads on each strand and I used all the same color. Remember to put bead stoppers on the strands you aren’t working on to keep the beads from falling off.
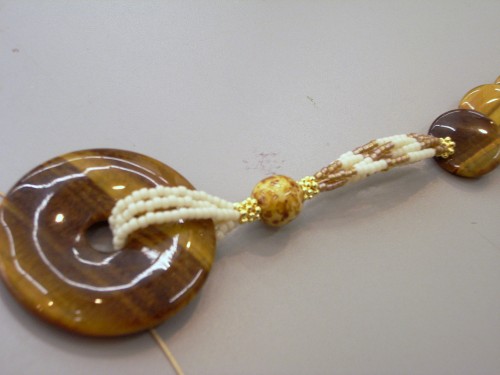
3. Putting all six strands of wire together put three gold spacer beads, a round glass bead and then three more gold spacer beads on all six strands of wire.
4. Separate the wires and begin to string the seed beads in a pattern of 5 tan and 5 cream until you have 3 sets of tan and two sets of cream. (as shown above). Again, don’t forget to use the bead stoppers. There is nothing more frustrating than having beads fall off the wire. Ask me how I know! 🙂
5. Putting all six strands together again string 3 gold spacer beads, the three flat beads and then three gold spacer beads. The three flat beads I have are meant to string so that they over lap one another. I like the look but you could use any bead that appeals to you. Just make sure it’s larger than the seed beads and round glass beads to add interest to the piece.
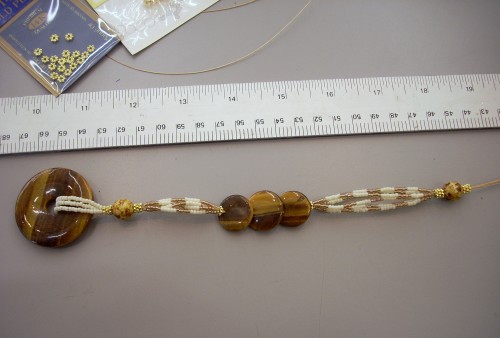
6. Back to the seed beads. Again, in sets of five 5…5 sets of tan seed beads and 4 sets of cream seed beads.
7. 3 gold spacer beads, a round glass bead and then three more spacer beads.
8. Alternate the 5 tan and 5 cream seed beads until you have about 1.5 – 2 inches of wire left. Don’t forget those bead stoppers!
NOTE: Look back and double check your pattern and beads to make sure everything looks just like you want it to. Once the necklace is crimped there is no going back.
9. To finish off this side of the necklace we’ll be crimping 2 wires to each of the loops on the three strand clasp. Two strands of wire for each loop = six strands of wire on three loops.
10. Place a crimp bead and one loop of the three strand clasp onto the wire. Bring the wire back through the crimp; you can bring the wire through so there is a small amount sticking out past the crimp bead, but no more than ½” is recommended.
11. Put the crimp bead into Section 1 of the crimping pliers. Hold the two pieces of wire apart while compressing the tool, ensuring the wires are held within the crimp on opposite sides of the curve.
12. Put the curved crimp into Section 2 of the crimping pliers so the concave side of the curve is facing the handle of the pliers. Gently compress the pliers, curving the crimp bead into more of a tube shape.
13. Repeat this process until all six strands of wire are on the clasp and crimped.
Now it’s time for the second side….
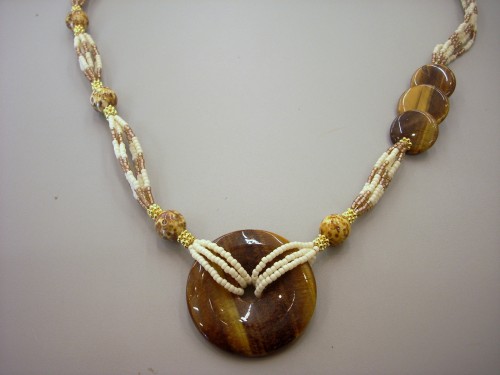
14. As with the first side, put seed beads on three of the wires to go through and around the focal donut bead. Use the same number of seed beads as you used on the first side. Put bead stoppers on strands to keep the beads from falling right off.
15. Thread three gold spacer beads, a round glass bead and then three more gold spacer beads.
16. Back to the 5 seed bead pattern with 5 groups of tan and 3 of the cream.
17. Three gold spacer beads, round glass bead and three spacer beads.
18. Seed beads 2 tan sets of 5 and 2 cream sets of 5.
19. 3 gold spacer beads, a round glass bead and three spacer beads.
20. Now for the home stretch… Thread 5 tan seed beads and 5 cream colored seed beads in the repeated pattern until you have 1.5 – 2 inches of wire left.
NOTE: Look back and double check your pattern and beads to make sure everything looks just like you want it to.
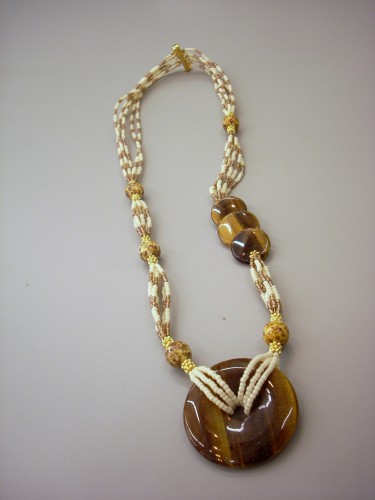
21. Finishing up the second side… just like the first side. Place a crimp bead and one loop of the three strand clasp onto the wire. Bring the wire back through the crimp.
22. Put the crimp bead into Section 1 of the crimping pliers. Hold the two pieces of wire apart while compressing the tool, ensuring the wires are held within the crimp on opposite sides of the curve.
23. Put the curved crimp into Section 2 of the crimping pliers so the concave side of the curve is facing the handle of the pliers. Gently compress the pliers, curving the crimp bead into more of a tube shape.
24. Repeat this process until all six strands of wire are on the clasp and crimped.
The number of steps listed to make this necklace may seem overwhelming but it’s really not that hard at all to make. Give it a try!
If you make this project why don’t you take a picture and I’ll post them here. I’d love to see the different patterns and color combinations you all may come up with.
I have lots left to do today so I’d better “bead” it. Haha!
