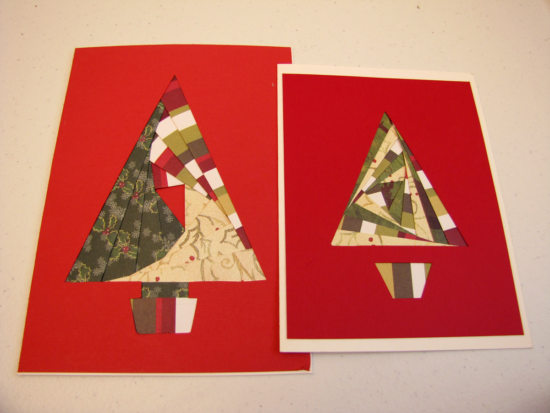
I first tried Iris Paper Folding 7 or 8 years ago. At first I looked at the finished cards and thought wait, what? It looked so complicated but it wasn’t until I checked a book out of the library and tried making it myself that I got a chance to see how easy it really is. Honestly, it’s folded paper laid down in a pattern and held in place with tape. You can do this!
And then tell all of your family and friends how you slaved over their holiday cards.
Supplies:
- Cutting mat
- Craft knife
- Tape
- Double sided tape
- Ruler
- Cardstock for face of card
- Iris pattern printed out on lightweight cardstock
- Blank card
- 3 Coordinating scrapbook papers
- Bone Folder
Directions:
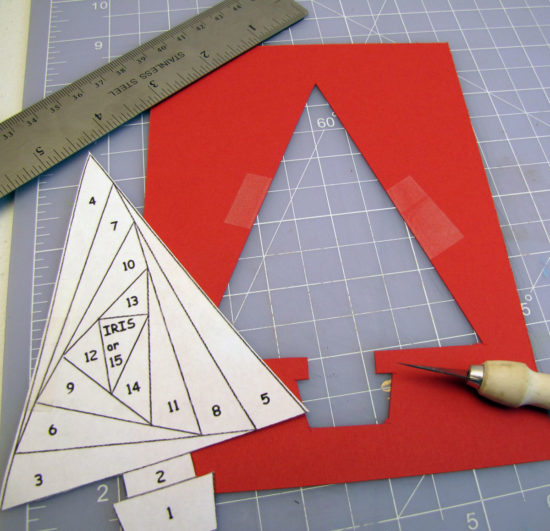
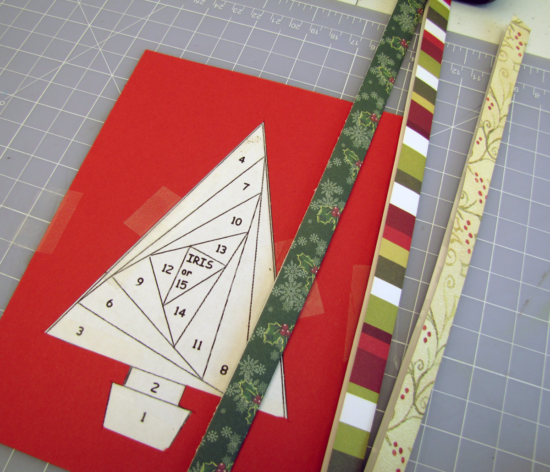
Print the iris pattern on lightweight cardstock or copy paper and cut it out as shown with scissors or craft knife. (Google Iris Paper Folding to get some patterns or see if you local library has a book) A ruler helps with the straight edges.
Tape the cut out pattern onto the back of a colored piece of cardstock. Using a craft knife cut the center out of the cardstock as shown.
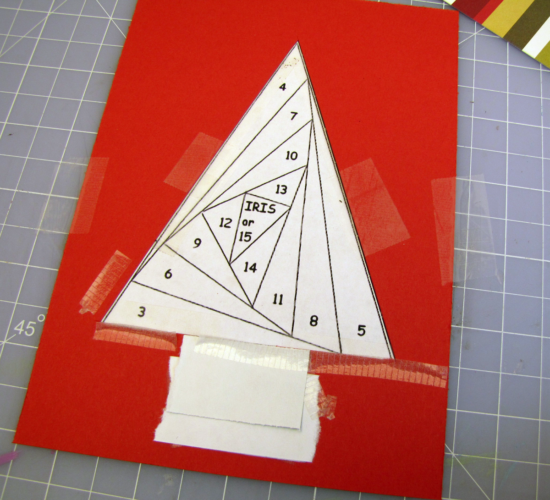
Now, remove the pattern from the cardstock and tape the pattern to the cutting mat.
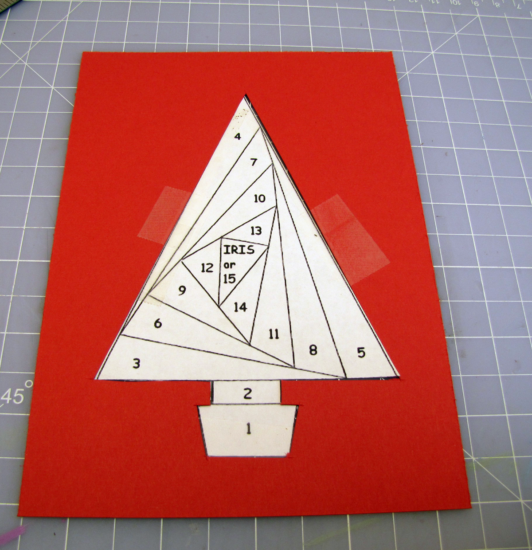
Tape the cut colored cardstock , face down, to the mat with the pattern in the center of the cutout as shown.
This is where you will be doing your design work. The back side of the card face.
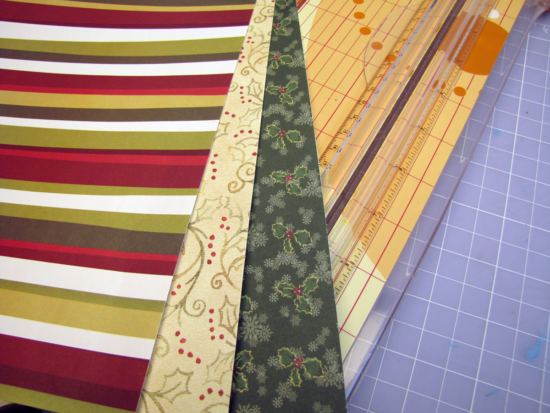
Cut 2 or 3 strips of each pattern of scrapbooking paper into 1 1/2 inch strips and fold in half lengthwise. Use a bone folder to get a sharp crease.
Cardstock does not work well for this part of the project.
Begin at the #1 position and cover that portion of the pattern with paper.
The #1 and #2 position on this pattern are fairly wide so I didn’t fold the paper.
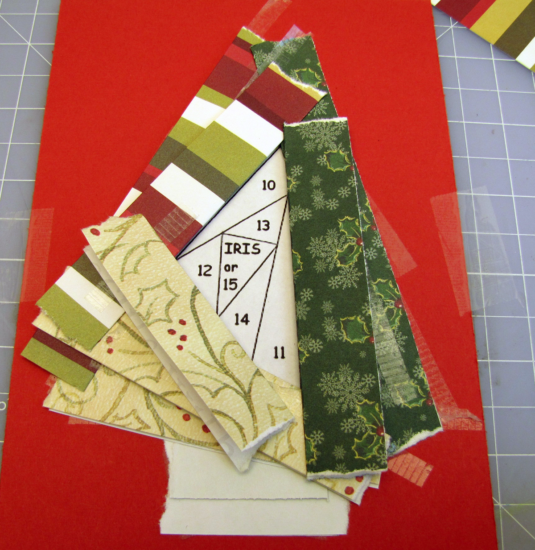
NOTE: The folded side of the scrapbook paper always faces the center of the pattern.
NOTE: You can cut or tear the strips of paper to the correct length. Whichever works best for you
Cover the #3, #4 and so on portions of the pattern with the next color of scrapbook paper.
Continue until all of the numbers are covered.
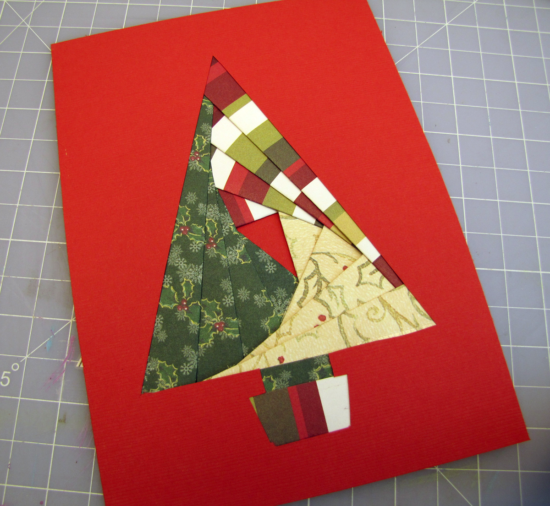
Fill in the center with scrapbook paper or a bit of the cardstock.
Tape around the edge of the cardstock and center it in the middle of a blank card face. Press well to adhere.
In the very first image you will notice that I filled in the pattern two different ways. 1 Alternating the patterns of paper or 2 using the same pattern on one side of the tree. Play around with various combinations to see which you like best.
Do you make your Christmas Cards or buy them?
