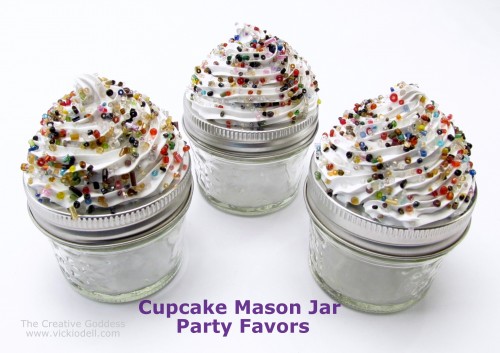
Cupcakes and Mason Jars.
Are ya about sick to death?
Do you have room for one more cupcake and mason jar craft?
Just one?
It’s really cute and involves a trip to the hardware store?
If you are like me you LOVE going to the hardware store. It’s a fabulous place for all sorts of crafty inspiration.
In fact, that’s where I got the idea for mason jar cupcake favors in the first place.
I went to the hardware store to buy small jars for my Gifts from the Kitchen with Driscoll’s Berries post last week and while the clerk went downstairs to find small canning jars for me I started looking around at all of the great potential craft supplies.
And mason jar cupcake favors were born as a way to use up the left over jars that I knew I would have.
Supplies:
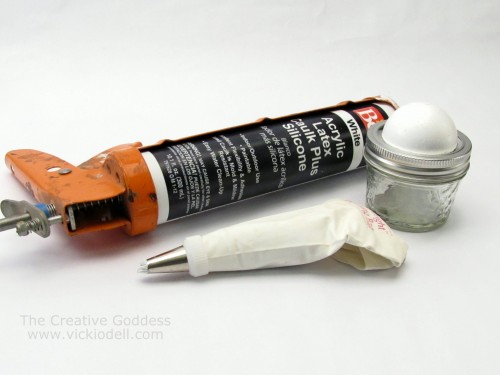
- Acrylic Latex Caulk
- 4oz Mason Jars
- Smoothfoam 2 inch balls
- Icing bag and star tip (optional)
- Caulk Gun
- Seed Beads
- hot glue gun and glue
Cut the 2 inch smoothfoam balls in half VERY CAREFULLY.
Place half of a smoothfoam ball on a jar lid and hot glue in place.
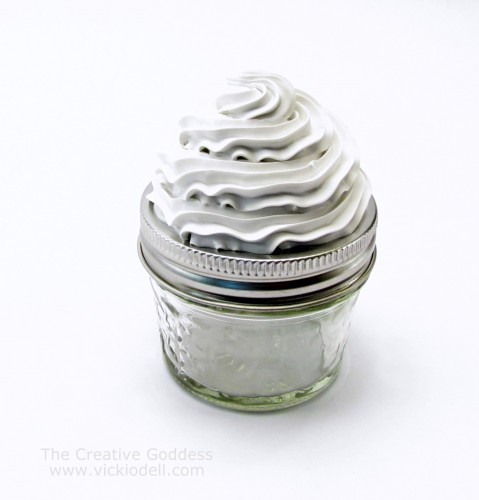
Place the star tip on the icing bag and then fill the bag with caulk using the caulk gun.
You are going to need some strong hands for this project.
Pipe the caulk around the jar making sure to put the first round down along the seam where the jar lid and jar ring meet in order to seal them together.
Continue caulking until you’ve covered the smoothfoam ball.
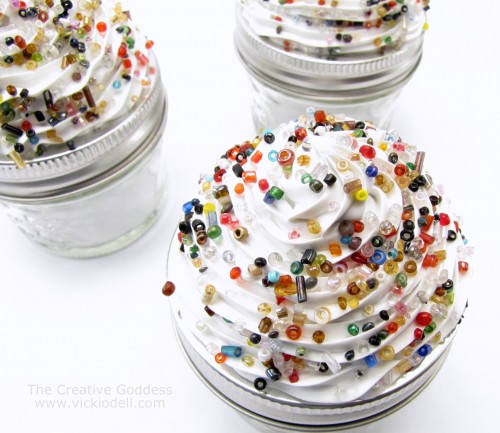
Sprinkle with seed beads and set aside to dry.
I’m making these for a holiday event I’m going to this weekend.
I’ll fill them with red and green m&m’s but once the candy is gone they can be used to hold all sorts of tiny treasures.
I love giving little things that are enjoyable AND useful, don’t you?


Hi Vicki! I just made these and they look super cute!! My question is how do you remove the caulk from the star tip? I have mine marked so I don’t accidentally use it for food, but want to be able to clean out the remaining caulk so that it doesn’t gum up when I make these again.
Thanks!!
Made these for a tea I had this past week. I painted the lids white. Set them in fancy cupcake liners before setting on the table. Adorable. The idea of the half Styrofoam ball is brilliant. Thanks!
Hi Fran,
Thanks for the comment. I’m glad they turned out well for you! 🙂
Hello! I love this idea but don’t have time to make them myself. Do you sell these? If I put in an order of say 80?
Thanks!
I’d be happy to make some for you Jeanne as long as we are shipping to the US. How many do you want?
Feel free to email at creativegoddess (at) vickiodell (dot) com or send a convo via my etsy shop
Vicki
Mrs. O’Dell,
I had a friend send me over to your tutorial above a while ago. I absolutely fell in love with these! They are SO adorable!
Thank you!
Megan Chomic
Hi Megan, thanks so much for the sweet compliment. I’m glad you like them!
Vicki
Thanks for the cute idea. I tried these as favors for my daughter’s 2nd birthday party. They turned out really cute. A few tips:
1) There’s lots of different kinds of caulk, and they don’t all produce the same effect. Loctite white polyseamseal caulk+ was my favorite because it was shiny. The Dynaflex 230 stuff was too pasty, but it looked cute once I got the hang of it.
2) They take a long time to dry. Some of mine are still mushy after 2 days. Don’t leave these for the last minute!
3) It took me 2 tries to get the look and effect right. Caulk is a new medium for me!
4) Another site with the same craft recommended spraypainting the lids white. It looked really cute in the picture. Unfortunately, the effect didn’t come out as great on my lids.
5) Using hotglue to adhere the seal to the rim wasn’t 100% effective. A bunch of them broke and had to be re-glued.
Anyway, it was really easy overall. Just a few glitches. 🙂
That’s great. Thank you for sharing you experiences. I’m sure it will be really helpful for other readers.
I’ve noticed them on a few sites since I posted mine. And here I thought it was an original idea. Oh, well.
If you’d like to share a photo of your finished project I’d be happy to share it here.
As for the spray paint, I think you’d have to scuff up the surface and then wipe it down with alcohol or mineral spirits to have more success. Otherwise it will just flake off.
Again, thanks for commenting and sharing your expertise.
Vicki
SO cute! This is adorable and so creative!
Thank you! I gave several away around the holidays and everyone loved them.
I tried this project over the weekend and my caulk ran down thw side of the jar. Any tips???
Hi Kelly,
Did you use acrylic caulk? It’s pretty thick.
Also I didn’t put first ring of caulk very close to the edge.
Do you have a photo to send? That might help me figure out the problem.
Vicki
I guess I didn’t pay attention to the “type” of caulk I bought. I used the whole tube and don’t have it anymore, so I will go by more and be sure to get acrylic. I also removed the “melting” caulk so I don’t have a picture.
I will try it again and see what happens this time. Someone else said to do it outside where it is cold, that perhaps it was too warm in the house.
Got it to work!! Yea, it took me a bit, but they look great. Thanks for such a great idea.
Yay! So glad everything worked out of you. 🙂
This is TOO delicious!! Off to find 4 ounce jars…
Hi Donna,
Super! I can’t wait to see yours.
V
This is a great idea and certainly will be having a go at this project. Thankyou so much for sharing.
Thank you for your kind comment and compliment, Kim! 🙂
Hi, I love this project. I’ve done this with my daughter. I found it on YouTube. It’s really popular in China. They call it Decoden. My daughter and I decodened everything. We use little boxes and tin containers for last Christmas. I even Decodened my cell phone case. It’s a great project to do with children. Thanks for sharing your wonderful projects with us. It’s always an inspiration. Thanks,Sara.
Hi Sarah,
I thought Decoden had lots more stuff embedded into it but maybe I was wrong. I’ve seen it done in lots of places online.
I’m glad to hear that you and your daughter found something fun to do together! 🙂
Vicki