Welcome to the third annual Handmade Holidays Blog Hop. This is my first year participating and I’m so happy to be involved. I’ll have a new project each of the three days and there will be lots of other blogs to visit and inspiration for your own handmade holidays to be had.
PLUS someone will win a fabulous prize! More on all of that at the end of the post.
There are plenty of upsides to having your kids grow up and leave home and one of them is that you get to make MORE crafty holiday decorations.
I had forgotten that it takes a few years to be able to deck out even a small apartment in full holiday decor. Last year I noticed some kind of bare spots in my kids’ apartments and such so I started making some Christmas decorations this year that I think they will like that I can give them BEFORE Christmas.
An early gift. Or two… or three.
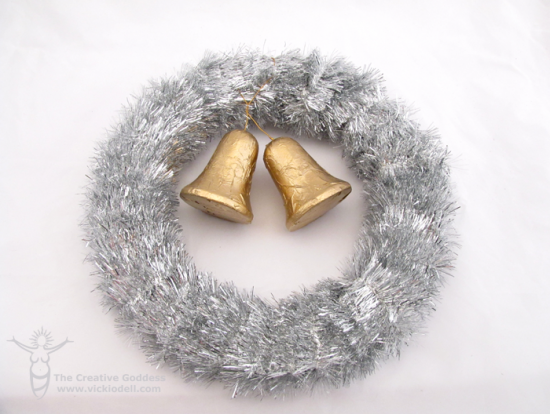
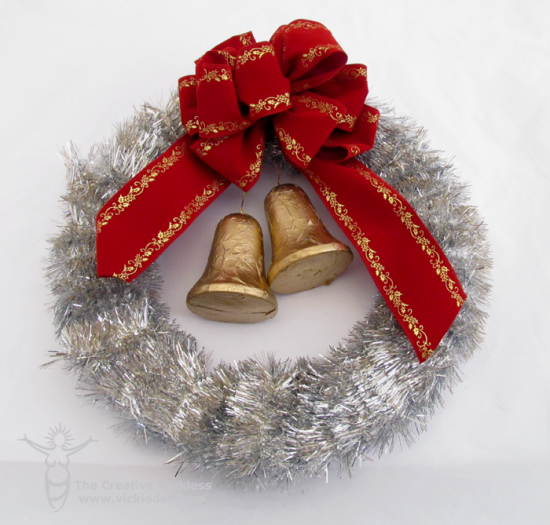
Vintage Inspired Bell Wreath
Supplies:
- Smoothfoam Wreath Form
- Smoothfoam Bells
- Silver Tinsel
- Deco Pauge Medium
- Foam Paint Brush
- White Tissue Paper
- Spray paint in Metallic Gold and Brown Boots
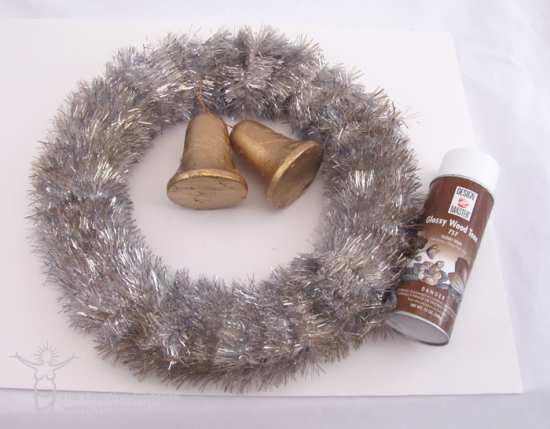
- Spray paint in Glossy Wood Tone -optional
- Metallic gold wire or ribbon
- Two kabob skewers
- Ribbon of your choice
- Floral tape covered flora wire
- Fern Pins
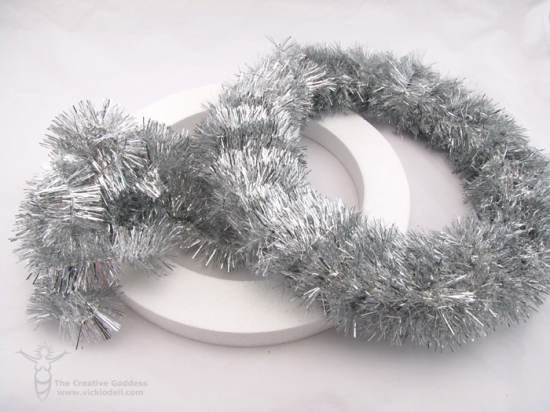
Secure one end of the tinsel to the wreath form with a fern pin.
Wrap the tinsel around the wreath form covering all of the form. Cut the tinsel and secure the end with a second fern pin.
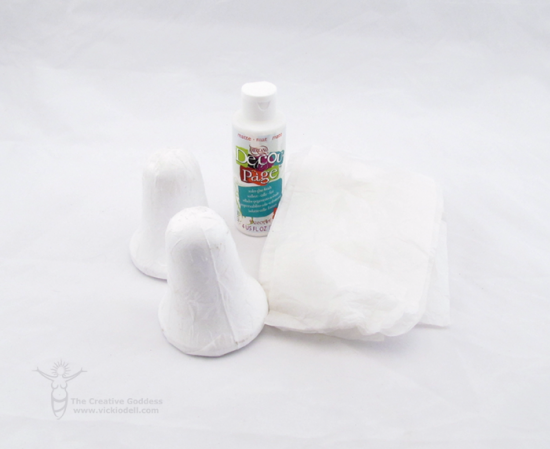
Cover the wedding bells in tissue paper. Crumple up the tissue paper to give it some texture and adhere it to the bells with decopauge medium. Let dry.
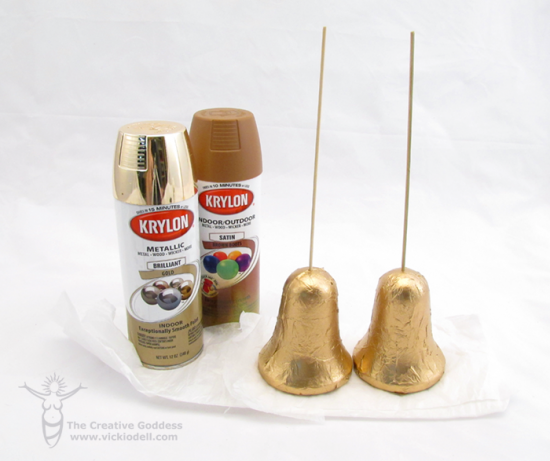
Poke the kabob skewer into the top of the bell to use as a handle while painting.
Paint the bells with Metallic gold, let dry.
Paint very lightly from quite a distance away with brown boots if the metallic gold is a little too shiny for your liking. You won’t want to coat the bells in brown but just add a dusting of color to tone down the metallic a bit.
Be sure to also leave some sections unpainted with the brown so that it looks unevenly aged.
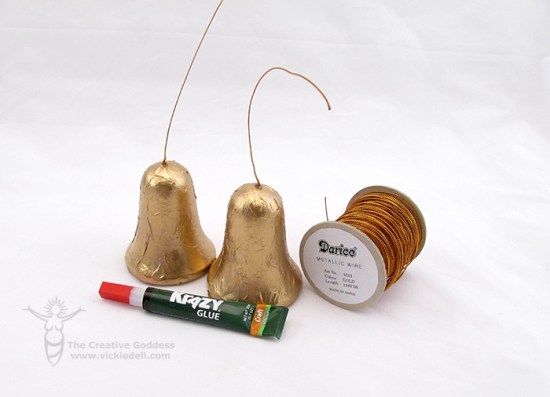
Remove the kabob skewers and replace with gold covered wire or ribbon. Put a few dots of glue into the hole left by the skewer and then add the wire or ribbon. Let dry.
Secure the bells to the wreath form with a few more fern pins.
To age the tinsel and the bells spray with Glossy Wood Tone spray paint. Start with very light coats and build up to your liking.
The color tends to fade a bit as the paint dries so you may wish to go back and add more color once the first coat has dried.
Finally, add a bow. If you need help making a bow I’ve created a video How to Make Floral Bows. It’s really easy once you have a little practice.
This post is part of the Third Annual Handmade Holidays blog hop!! The best crafters, designers, and makers have come together to create and share a series of thoughtful, handmade gifts for the holidays during this 3 day blog hop. Our goal is to inspire you to create something from the heart this holiday season as well as share how to use our products in fun, innovative ways. We intend this hop to serve as a resource to you for this holiday season and for years to come.
Hop along to each blog in the list. Each day, from November 1 through November 3, 2013, we’ll be posting a brand new list of blogs to hop to. Comment on each blog, share your favorite posts over social media, and then use the Rafflecopter widget at the bottom of each post to enter to win the Grand Prize, a gift basket filled with crafty swag from the companies on the hop! We’re ready to inspire, share, and create – are you ready to hop?



IS so beautiful!!!
Love all the silver!
Vicki, You are so talented and creative. Your projects for this blog hop are so beautiful. Thank you for sharing your talents with all of us.. Have a great Holiday season
Thank you so much Denise. I really appreciate your kind comment.
You have a great holiday too. ♥♥♥
gorgeous wreath!
Lovely thanks for the tutorial and inspiration.
My pleasure 🙂
Fantastic wreath and your bow and bells are so perfect!!!
Thank you, Lainie! 🙂
This reminds me of happy memories of the things my mother had when I was a child. I am making this wreath!
Yay! I hope you will share a photo. I love featuring reader projects here and on my facebook page. 🙂
Lucky kids:-) love how you toned down the gold and gave everything a vintage patina.
Thank you! 🙂
Love the vintage look of the wreath. TFS!
Thank you! 🙂
This is a real cutie. so vintage. I love it.x
YAY! Thank you! 🙂
What a wonder wreath. I just love it. Thank you for sharing how you made it. Beautiful.
Thank you so much, Linda! 🙂
Great looking wreath! Thanks for the tutorial. Thanks for sharing.
Katie B.
Thank you, Katie. My pleasure. 🙂
What a gorgeous wreath. Your kids will love it! I love how you added the paint to the tinsel and bells. It adds a lovely aged Patina! Genius idea! Thanks for the beautiful gift idea and tutorial.
Thank you for the lovely comment, Laura. I’m glad you like the wreath! 🙂
Lovely wreath. Love the silvery color and the vintage look.
<3 J
jwoolbright at gmail dot com
Thank you, Janis. I appreciate your compliments. 🙂
What a pretty wreath. We have lots of doors to decorate around here.
Thank you, Viki. I think they would look great on lots of doors! I often put wreaths on my kitchen cabinets and I might make a few more of these to do that with. 🙂
Lovely wreath!
Thank you so much, Wendy.
Your wreath looks lovely!
Thank you, Lynn. 🙂
What a great vintage wreath! Your kids will thank you for the xmas decorations! Handmade decorations are the best!
Thank you Cindy! Yes, handmade is always something special. 🙂
I pinned this wreath as it will make really cute holiday bazaar items. It’s nice to see what products you used and easy to follow directions.
Thank you for pinning and sharing Elizabeth. I really appreciate it. 🙂
This is sooo cute and super easy! Will be doing several of these!
Yay! Glad to hear it Mickie. I hope you’ll share a photo.
Love the bells
Thank you Aggie. 🙂
OMG!!! Love it!!!
Thank you De! 🙂
So beautiful yet super easy to make! I am going to get my grandsons to come and make some of these with me! I know they will have a blast and I will get to spend time with them! Win-Win for everyone! TFS!
Oh, I love this ornament! Thank you for the tutorial.
Wow, this is quite a hop! Will do my best to get through them all.lol Your project is great.
Thank you, Barbara for all of the support. I really appreciate your comments and help. ♥
OMG I freaking love this VIcki!! It is so modern but so traditional!!! I love your bow tutorial too!
Thanks a bunch, Jennifer. I really appreciate your compliment. 🙂
Beautiful wreath!
Thank you so much, Linda. I’m glad you like it. 🙂
This looks like fun. I think I’d add some distress ink to the bell to give the raised areas some prominence. With the new distress metallic paints, I think you could give it a cool patina look.
You’ll have to share a photo, Cynthia if you make some. ♥
Love the wreath!
Thank you, Kelly. 🙂