I wrote last summer about how I got a new gig teaching art classes for the city of Akron in the Parks and Recreation department. I have to say that It’s taken me a while to get my bearings with this job. Supplies aren’t easy to get, more crafty classes don’t necessarily go over well with the general population but are wildly popular with a smaller group and larger art pieces take quite a lot of time to develop. Also, I’m teaching in four different recreation centers so I always have boxes and tote bags full of supplies rattling around in the back of my vehicle.
Considering that I am a self-taught artist I find myself teaching myself all sorts of new things these days. Frankly, I find that pretty exciting and slightly exhausting all at the same time!
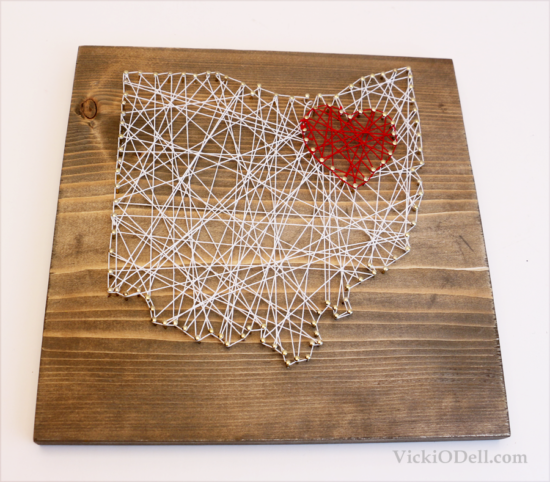
Don’t ask me why I haven’t shared any of the projects here yet because I don’t have a good answer for you. But HERE. Is the string art I did for February and it was a big hit even if it is more crafty.
Because it was February I wanted to do a project related to Valentine’s Day but not. I mean, not EVERYONE wants to celebrate the day. Ya know?
So I opted for an I LOVE Ohio project.
And here is what you’ll need to make your own:
- 12×12 cut of wood
- Nails with smaller heads – I preferred brass Escutcheon nails
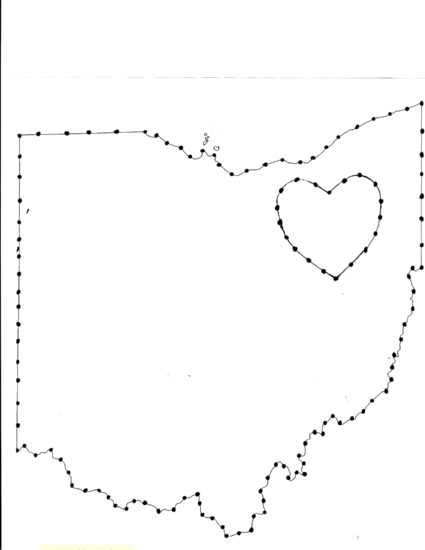
- Print out of your state (right click and then click on “print” to print the Ohio image above)
- Wood stain of your choice
- Paint Brush
- Rag or paper towels
- Sanding sponge
- Pliers
- Hammer
- Painter’s Tape
- String of choice – I used size 30
- Scissors
- Lightly sand the wood and stain according to manufacturers directions
- Sand again once the stain is dry if needed
- Print out the image of your state – or the one above
- If creating your own – Cut out a heart and draw its outline over the area of your choice.Place dots where you want the nails with a marker or pen.
- Center and align the printout on the dry and sanded wood
- Tape in place with painter’s tape
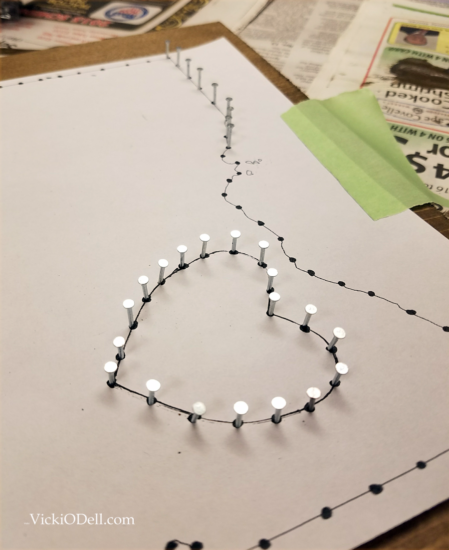
- Using the pliers to hold the nails pound a nail in the wood at each dot – be sure to do the heart in the center first
- Once all of the nails are in – tear the paper off the background
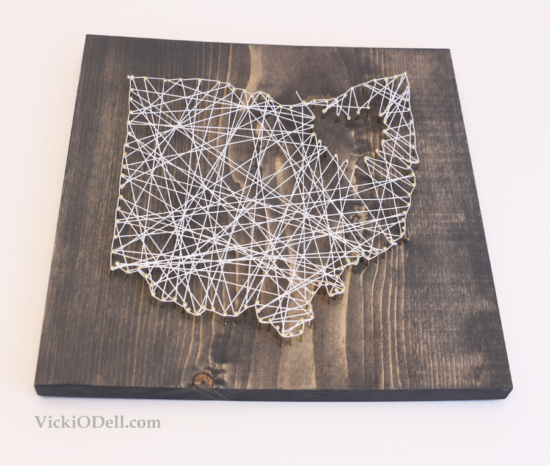
- Tie the thread to one nail and randomly wrap it around another nail head across the board.
- Repeat crisscrossing the state in a random manner wrapping the thread around the nail – be sure not to go inside the heart or outside the state outline with the thread – not easy along the Ohio river!
- Once all of the nails have been wrapped go around the outside to create an outline. You are simply connecting the dots.
- Once the outline is finished cut the thread and tie it to a nail to finish off.
- For the heart, repeat as you did for the state

That’s all there is to it.
What state do YOU love?
Love this project. Looks like so much fun to play with forms and weaving them into a beautiful shape. You need to come to the church and see the weaving projects that Kim M has displayed for the UUCA Art show.